Chilling Effects: Preventing Winter Damage on Commercial Hardwood Floors

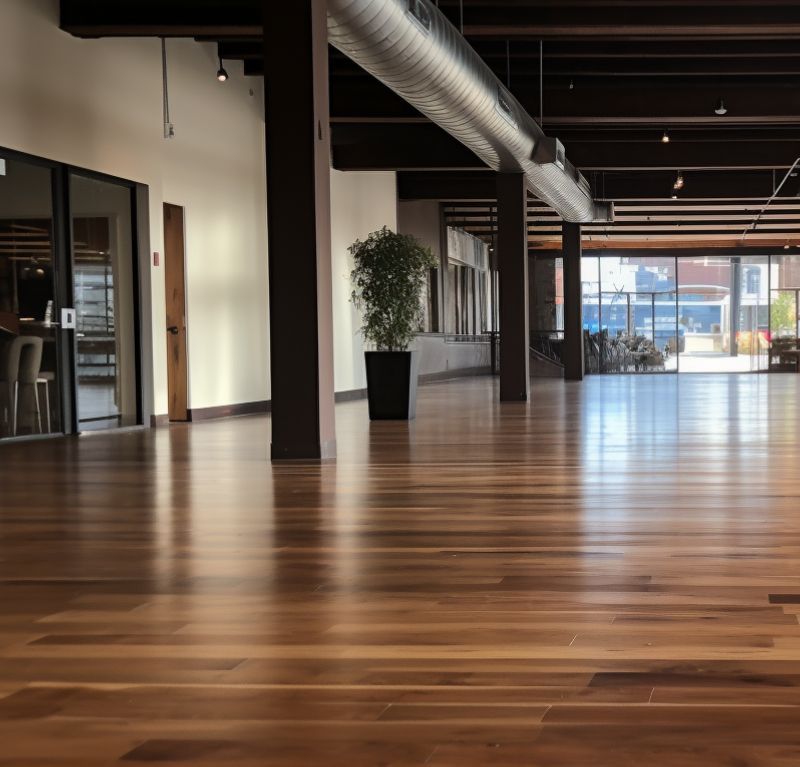
This article will discuss essential floor protection techniques for the cold season, the winter threats to commercial hardwood floors, choosin the right products to shield hardwood, and immediate steps needed to address winter-induced damages. Winter can bring a lot of wear and tears to commercial hardwood floors, no matter how robust and sturdy the hardwood is. Understanding the threats, and knowing the right steps to take to protect your hardwood, can help prevent costly damages.

Winter Threats to Commercial Hardwood Floors

Winter weather can be a serious threat to commercial hardwood floors for a variety of reasons. Cold temperatures can cause the wood to contract and crack, and high humidity can cause the wood to warp. Additionally, the combination of moisture and salt is an even greater threat as salt has the tendency to corrode the wood, causing irreparable damage. Snow and ice can make walking on the hardwood hazardous, creating slip and fall risks that, in a public setting, pose a financial liability.

On the other hand, commercial hardwood floors can be treated or otherwise protected from the hazards of winter, when taken into account at the beginning of a project. Common treatments include applying a coating of polyurethane, a waterproof sealant; or a wax based sealer, designed to weather high humidity levels. Similarly, if a pre-existing floor needs to be refurbished, it may be a good idea to use a polyurethane stripper followed by a sealer.

There are a few simple tricks to consider in order to best protect the commercial hardwood floor during periods of winter. For instance, using smaller mats in high-traffic areas for snow and ice-covered shoes before inviting guests directly onto the floor. Additionally, using adequate heaters can help cut down on the likelihood of humidity-induced warping.

In contrast, some commercial hardwood floors might not even require any extra protection beyond the usual cleaning and maintenance. If the floor is of a higher quality and is already treated, it might withstand the typical winter wear and tear with only a regular clean and buffing.

Finally, it is important to remember that installing the proper ventilation system, as well as regulating the humidity levels can also be invaluable means of protecting the hardwood floor in colder climates. If the ventilation is poor and the humidity levels are not closely monitored, there is a greater likelihood that the floor will succumb to winter weather mayhem. As a result, it is important to have a keen understanding of the wooden floor’s vulnerability, and plan accordingly to protect it from winter threats.

Essential Floor Protection Techniques for the Cold Season

The frigid temperatures, moisture, and abrasive materials that accompany the colder months can take a toll on your hardwood floors if not properly cared for. In this blog, we’ll explore a comprehensive set of essential techniques and strategies to ensure your commercial hardwood flooring not only survives but thrives during the cold season.

High-Quality Floor Mats:

One of the simplest yet most effective ways to protect your hardwood floors during winter is by strategically placing high-quality floor mats at entrances. These mats can help trap moisture, dirt, and salt brought in by foot traffic. Make sure the mats are large enough to accommodate several steps and have a slip-resistant backing to prevent accidents. Regularly clean and shake out the mats to remove accumulated debris.

Routine Maintenance:

Regular maintenance is crucial for the longevity of your commercial hardwood flooring, especially in the winter. Sweep or vacuum the floors daily to remove dirt and grit that can scratch the surface. Pay attention to high-traffic areas where wear and tear are more likely to occur. Additionally, consider using a microfiber mop or a damp mop with a hardwood floor cleaner to remove any remaining residue and maintain the floor’s shine.

Humidity Control:

Hardwood floors are sensitive to changes in humidity, and winter often brings dry indoor air due to heating systems. Invest in a humidifier to maintain an ideal indoor humidity level, typically between 35% to 55%. This prevents the wood from drying out and potentially cracking or warping. Proper humidity control not only protects your floors but also contributes to a comfortable indoor environment.

Protective Coatings:

Consider applying protective coatings or finishes to your commercial hardwood flooring. Polyurethane or acrylic finishes can act as a barrier against moisture, scratches, and stains. The type of finish you choose will depend on your floor’s specific needs and the level of traffic it experiences. Consult with a professional to determine the best option for your space.

Prompt Spill Cleanup:

Accidents happen, and spills are inevitable, especially in a commercial setting. It’s crucial to clean up spills promptly to prevent staining or water damage to your hardwood floors. Keep absorbent towels or paper towels on hand and educate your staff on the importance of immediate spill cleanup.

Furniture Pads:

To prevent scratches and dents from heavy furniture or equipment, use furniture pads or glides under the legs. These pads distribute weight evenly and reduce the risk of permanent damage to your hardwood floors.

Regular Inspections:

Finally, make it a routine to inspect your hardwood floors during the winter season. Look for any signs of damage, wear, or moisture accumulation. Address issues promptly to prevent them from escalating and becoming more expensive to repair.

Choosing the Right Products to Shield Hardwood

When it comes to protecting hardwood flooring, there is a wide array of products available to choose from. It is essential to choose the right products to shield hardwood since these products protect the flooring from wear and tear, moisture, and other elements. Moreover, the wrong products can negatively affect the flooring’s longevity and can even damage it. Therefore, when it comes to selecting products to shield hardwood, it is important to be mindful.

One of the most important factors to consider when selecting wood protectors is durability. Floor protectors come in various formulations, depending on the flooring’s purpose and condition. For instance, one may need more durable protectors for hardwood installed in humid areas. Likewise, a softer formula is better for wood surface in well-ventilated rooms. Similarly, for existing hardwood floors, a highly-durable formulation is necessary to protect from wear and tear over time.

It is also essential to consider the finish. Hardwood floor protectors come in various gloss levels such as matte, satin, and semi-gloss. For instance, a matte-finish protector may work best for hardwood floors that need to look natural. A semi-gloss or a glossy finish is better for hardwood floors that need to be cleaned frequently. Therefore, it is important to select a finish that best suits the purpose.

In addition, it is also important to choose a water and stain resistant protector. Hardwood is prone to damage, particularly when liquid is spilled on the floor surface, or when stains settle in. Therefore, using a protective finish that is resistant to water can help keep the hardwood flooring safe from water and stain-related damage.

Lastly, it is essential to factor in the environmental impact. When it comes to wood protectors, there are those with higher VOCs (Volatile Organic Compounds) content that are potentially hazardous to the environment, and there are those with low VOCs that are less hazardous and less toxic. Consequently, it is important to consider the environmental impact of the chosen hardwood floor protector and use the one that has the least environmental damage.

In summary, when it comes to selecting a hardwood floor protector, it is important to factor in several variables: durability, finish, water and stain resistance, and environmental impact. By taking these factors into account, one can choose a hardwood protector that is most beneficial to the specific floor and environment.

Immediate Steps to Address Winter-Induced Damages

Winter can be a tough season for commercial hardwood flooring, but fear not! We’ve put together a listicle of immediate steps to help you tackle and prevent winter-induced damages:

  • Use Mats and Rugs: Place heavy-duty mats at all entrances to trap moisture and prevent salt and snow from being tracked in. Regularly clean and replace these mats to keep them effective.
  • Keep Floors Dry: Immediately mop up any water or slush that makes its way onto the hardwood floors. The longer moisture sits, the greater the risk of damage.
  • Adjust Humidity Levels: Maintain consistent indoor humidity levels with a humidifier to prevent excessive drying or expansion of the wood due to fluctuations in moisture.
  • Choose the Right Cleaning Products: Use hardwood floor-friendly cleaning products and avoid harsh chemicals that can strip away protective finishes.
  • Regularly Inspect and Refinish: Periodically inspect your hardwood floors for signs of wear and damage. Consider refinishing before winter to add an extra layer of protection.
  • Repair Any Scratches or Gouges: Promptly address scratches and gouges to prevent moisture from seeping into the wood, which can lead to further damage.
  • Seal Gaps and Cracks: Inspect for gaps or cracks in the floor and seal them to prevent drafts and moisture infiltration.
  • Protect High-Traffic Areas: Use area rugs or runners in high-traffic zones to minimize wear and tear during the winter months.
  • Consult a Professional: If you’re unsure about the condition of your hardwood floors or need specialized advice, consult a professional flooring expert for guidance.

By following these ten steps, you can safeguard your commercial hardwood flooring from the challenges winter brings while ensuring it retains its elegance and durability. Remember, a little care today can go a long way in preserving your investment for years to come.

Final Thoughts

In conclusion, it is important to proactively protect hardwood floors during the winter season. Winter-induced damages can easily be avoided with the use of appropriate techniques to shield hardwood floors from the elements and immediate steps to address any damage that may have already occurred. Choosing the right products to protect hardwood floors, such as rubber mats, felt, area rugs, weather stripping, and door kits, is also key to preserving these floors. Taking these steps can help ensure your hardwood floors maintain their beauty and integrity, despite the harsh winter weather.

Frequently Asked Questions

How does winter impact commercial hardwood floors?

Winter can have an effect on hardwood floors, as extreme temperatures and added humidity can cause the flooring to expand and contract. This can cause cupping, splitting, and gaping, eventually leading to joint and finish damage. As a precaution, it is best to keep humidity levels at optimal levels to reduce the amount of contraction and expansion. Additionally, mats should be placed in all areas where people and pets enter from outdoors, to reduce the amount of moisture and grit that gets brought in.

What preventive measures can businesses take against winter damage?

Some preventive measures businesses can take that may help protect from winter weather damage include:

1. Make sure exterior surfaces are sealed properly before temperatures drop.

2. Check the HVAC system and insulate pipes and valves to avoid freezing.

3. Remove leaves, debris, and snow from gutters and downspouts.

4. Clean and inspect the roof and repair any problem areas.

5. Use weather stripping and door seals to keep out cold air.

6. Install storm windows.

7. Insulate windows and doors to maintains a consistent temperature.

8. Keep the property well-lit to discourage burglaries.

9. Check the landscaping for any exposed roots or weakened structures.

10. Store any expensive outdoor equipment in a safe, dry place.

Are certain hardwoods more resilient to winter effects?

Yes, certain hardwoods are more resilient to winter effects. Hardwoods that are denser, such as oak, hickory, and maple, are better able to withstand the winter elements, such as cold and wet weather, than some softer species, such as pine and poplar.

How can salt and snow residues be effectively removed from hardwood floors?

To effectively remove salt and snow residues from hardwood floors, you should begin by vacuuming the floor to remove any loose debris. Next, mix a solution of warm water and white vinegar, and apply it to the affected area with a mop, allowing it to sit for several minutes. Afterward, use a soft cloth dampened with the vinegar solution to wipe off any remaining residue. For persistent stains, you can also try using a small amount of baking soda on the damp cloth to further loosen the stain. Rinse the area with warm water once you’ve finished and then allow it to dry.

Mattress Cleaning for Pet Owners: Hair, Dander, and Odor Solutions

As a pet-owner, it is important to understand the unseen impact of pets on your mattress, and effective techniques for removing pet hair and dander, neutralizing pet odors, and maintaining a clean mattress for a fresh sleeping environment with Furry Companions by your side.

The Unseen Impact of Pets on Your Mattress

Having a pet can be a great source of joy and companionship, and it’s easy to overlook the worrying consequences that can come from having a pet up on your mattress. Pets can bring about unseen damage to a mattress over time, and pet owners should take proactive measures to prevent costly repairs.

The accumulation of pet hair is one of the most common problems when it comes to pet mattress damage. Hair can work its way down deep into the folds and hard to reach areas of the mattress, such as along the creases. Regularly vacuuming is important to remove any excess fur that may have built up.

On the other hand, pet saliva and the oils found in fur can also leave behind lasting damage. These agents can form stains on a mattress or cause the mattress to break down over time. Similarly, pet sweat and odors can lead to the buildup of bacteria-causing bacteria and create an unhygienic sleeping environment. In addition, many pet owners don’t realize that fleas and other pests can also live in fabric and will feed off the dust mites that have made a home in the mattress.

It’s important to address these problems head on and take precautionary measures to protect the mattress. Washing pet bedding regularly or investing in special mattress covers are good ways to prevent any unseen pet mattress damage. Also, regular vacuuming and turning your mattress over every few months is a good way to keep it healthy. As a result, pet owners can rest easy knowing that their pets won’t cause any unseen damage to their mattress.

Effective Techniques for Removing Pet Hair and Dander

When it comes to owning furry friends, pet hair and dander are constantly present in our homes. Although it’s lovely to be welcomed home by a furry companion, the mess that is left behind can become a nuisance. Therefore, there are a few techniques to help minimize the mess and keep your home looking neat.

For starters, always brush your pet regularly. This is key resolution for keeping pet hair and dander under control. It helps to remove dead hairs, dander, as well as dirt and debris in your pet’s coat and keep their skin and fur healthy. Furthermore, many pet owners claim that using the FURminator, a specialized brush that helps remove dead hair, is beneficial.

On the other hand, a vacuum with a HEPA filter may become your best friend. HEPA stands for high efficiency particle arresting filter, and it increases the efficiency of vacuuming to capture microscopic particles which an ordinary vacuum wouldn’t have the power to do. Similarly, use specific pet vacuums which contain an attachment for pet hairs and navigate it across the floors and furniture to help capture the pet hair.

In addition, using a damp cloth is also an effective technique. Your lint roller may become insufficient when dealing with pet hair and dander, so a damp cloth can help cut to the chase and remove fur and dander from any surface. Moreover, using a rubber glove is also beneficial. Simply put the glove on and wipe the area and loose fur and dander will easily come off.

Finally, regularly washing your pet’s bedding and brushing out fur and dander is also a must. As a result, your home is sure to stay fresh and clean in the presence of your furry friend.

Neutralizing Pet Odors for a Fresh Sleeping Environment

Good pet ownership requires tending to their needs, as part of this, being able to provide a comfortable and clean sleeping environment for them is essential. Though this may be difficult to achieve, with competing human needs, if there is a pet in the home it is important to initiate and maintain a comfortable sleeping environment for them as well. One issue that may crop up over time is a buildup of pet odors that may cause the sleeping environment to become uncomfortable and unhealthy. Therefore, there are a few simple measures one can take to help neutralize pet odors in a sleeping environment.

On the other hand, one of the most effective ways of dealing with pet odors is to clean the sleeping environment. This should be done routinely or even daily, as pets can often spoil a bed with their pet odors in a short period of time. Vacuum, wash, or replace the bedding in the sleeping environment depending on the severity of the pet odors. This should be done as often as needed to keep the odors to a minimum.

In addition, vacuuming the rest of the sleeping environment, especially the carpets, can help to reduce pet odors. Similarly, opening windows, weather permitting, or use of ceiling fans can help to circulate air, and reduce the strength of odors throughout any room.

For instance, the use of special pet odor neutralizing sprays and cleaners can also be very effective in reducing pet odor concentrations in sleeping environments. Usually, these contain enzymes that help break down the organic compounds that may cause pet odors, and dissipate the odors as the enzymes go to work. Make sure to check the label to make sure the spray or cleaner is indeed meant for pet odors, as other cleaners and sprays may simply be fragranced to mask the pet odors.

Some people may also consider using candles, or diffusers to spread cleansing aromas such as citrus and rosemary throughout the home. These fragrances can help to temporarily mask the pet odors and create a more pleasant and comfortable smelling sleeping environment.

As a result, a few simple measures that can be taken to help neutralize pet odors in sleeping environments is to clean the sleeping area frequently, vacuum carpets and other easily missed areas, allow fresh air ventilate the environment, use pet odor neutralizing sprays, and the use of scent fillers like candles and aromatherapy diffusers to help mask and reduce the overall pet odor of the environment.

Consequently, by following these steps, one can reduce pet odors in a sleeping environment for their pet, making a cleaner and more enjoyable atmosphere to sleep in.

Maintaining a Clean Mattress with Furry Companions

Maintaining a clean mattress in the presence of furry companions who like to keep snuggling into your bed can be quite a difficult task. However, with a few useful tips and tricks, you can keep your bed free from dirt, fur, and drool, while still being able to spend some quality cuddle time with your furry friends.

The first and one of the most obvious steps is to vacuum your mattress regularly. This is particularly important if you have a vacuum able to pick up pet hair, such as those with a HEPA filter. Vacuum at least once a week, covering every inch of the top and sides to ensure that no fur is left behind. Moreover, washing your bed sheets weekly is also essential to keep your mattress clean from fur and drool. Make sure to use a laundry detergent specifically designed for pet owners.

On the other hand, also make sure to protect your mattress with a waterproof mattress protector to prevent any moist seeping through to the mattress. Though even choosing the best mattress protector, you might need to clean your mattress often, as fur may still stick to the fabric used. To do so, use lukewarm water and pet safe detergent. Similarly, you could also use an upholstery attachment to vacuum the mattress protector.

In addition, keeping your pet clean will also help maintain a clean mattress. Make sure to give your pet regular baths and brush them regularly in order to reduce shedding. You can also use dusting cloths or a pet groomer’s comb with bated blades to reduce any fur left sticking to the mattress protector. Similarly, if your pet drools a lot, make sure to clean up spills straight away before it has a chance to damage your mattress.

Maintaining the cleanliness of your mattress when furry companions are part of your daily life can be quite a challenge. However, with the right tips and tools, you can keep your mattress clean and still spend some quality snuggling time with your little ones. Consequently, these few steps can ensure that you and your furry friends can sleep comfortably and peacefully night after night.

Final Thoughts

Having a pet can have an unseen impact on your mattress, making routine maintenance and cleaning an essential part of owning a pet. To keep your mattress clean, you need to vacuum pet hair and dander regularly and also neutralize odor-causing bacteria with a specific pet-detail cleaning solution. Utilizing effective techniques such as an enzyme cleaner solution, cleaning upholstery, and washing bedding on a more frequent basis can be beneficial in maintaining a clean mattress, even when living with furry companions. In taking the necessary steps in maintaining your mattress, you can keep your mattress clean, fresh, and free of pet hair and odors for a sound sleep and healthier sleeping environment.

Frequently Asked Questions

How often should pet owners clean their mattresses?

Pet owners should ideally clean their pet’s mattress at least once a month. Doing so will help keep any potential messes or odors to a minimum and promote good hygiene. It’s a good idea to rotate your pet’s mattress every few months, depending on its size and how often your pet uses it.

What cleaning solutions are safe for mattresses and pets?

It’s best to opt for natural, non-toxic cleaning solutions when cleaning mattresses and surfaces around pets. You can make your own cleaning solution by mixing one cup of baking soda with a few drops of dish soap and warm water, or use vinegar and water. Both methods are safe to use around pets. Avoid using bleach or strong chemicals, as they can be dangerous to your pet’s health.

Can regular cleaning extend the lifespan of my mattress?

Yes, regular cleaning can help to extend the lifespan of your mattress. Cleaning your mattress regularly can help to remove dirt, dust, and other debris from the mattress, which can cause wear and tear on the mattress. Vacuuming the mattress regularly and spot cleaning any spills or stains can help to keep the mattress in good condition and help to extend its useful life.

How can I prevent pet dander accumulation on my bed?

To help prevent pet dander accumulation on your bed, try the following tips:

1. Vacuum your bed regularly – Use a vacuum cleaner with a HEPA filter to reduce the amount of pet dander that is left on the surface of your bed.

2. Shampoo your bedding – Regularly shampoo your mattress and bedding, using a vacuum with a crevice tool to help loosen the dander buildup.

3. Wash your pet’s bedding weekly – Wash your pet’s bedding once a week as well as any other furniture that your pet can access.

4. Use an air filter – Consider using an air purifier that is designed to filter out pet dander, to help reduce the amount of dander in the air.

5. Keep your pet off the bed – As much as possible, try to keep your pet off your bed to prevent the accumulation of pet dander.

Grout Got You Down? The Benefits of Professional Clean-Up

Are you considering removing that dirt and grime from the tile floor in your kitchen or bathroom by DIY grout cleaning? While this may seem like the best and most cost-effective approach, the truth is that DIY grout cleaning just doesn’t cut it. Professional grout cleaning with The Honest Guys takes into account the science of grout cleaning and tile restoration, allowing you to enjoy a reliably clean, healthy and visually-appealing living space with increased property value.

Why DIY Grout Cleaning Just Doesn’t Cut It

Maintaining a clean surface is a key task for many home owners, and oftentimes this means cleaning your tile grout. Many people attempt to tackle this job themselves, often called DIY grout cleaning, however this is not always a sufficient solution for long term results.

Moreover, DIY grout cleaning can be tedious and time consuming. For instance, getting the grout totally clean may require a lot of scrubbing with stiff bristled brushes and caustic chemicals. Additionally, due to the hard-to-reach nature of most grout, DIY methods like this may not even get into all the nooks and crannies.

In contrast, professional grout cleaning services employ heavy duty cleaning tools to deep clean, allowing for much more targeted and effective cleaning. Furthermore, specialized cleaners and high-pressure rinses are used to flush out dirt and residue, leaving grout totally clean. Professional services also have access to more powerful equipment, such as industrial grade steam cleaners and UV light sanitizers.

Consequently, professional grout cleaning services offer much better results than what DIY cleaning is capable of. Not only is it quicker and easier, better results are likely, meaning no more scrubbing to get the desired level of cleanliness. As a result, professional services are often the preferred choice for quickly achieving a clean and aesthetically pleasing finish.

The Science Behind Professional Grout Cleaning

Professional grout cleaning is essential in any kitchen or bathroom, as it removes dirt, grime, and allergens, making surfaces look and feel fresh and clean. While the initial job of cleaning the grout may seem simple, there’s a lot of science that goes into achieving professional results.

Grout itself is a porous material, and over time can become discolored and accumulate dirt and debris. For this reason, professional cleaning requires the right combination of solutions and an understanding of the chemical properties of those solutions.

For instance, a professional grout cleaner may use a weak acid solution to remove dirt and grime. The acid reacts with the dirt, which helps to break it away from the grout, making it easier to clean. However, it’s the acid’s ability to break down soap scum and grease that is really beneficial. When these substances have been removed, the grout is easier to scrub and ultimately looks brighter.

Moreover, a professional grout cleaner understands the importance of humidity and the effects on the grout. The porosity of the grout can make it vulnerable to staining from dirt and debris that can get trapped within its structure. Therefore, professional cleaners will often use a steam cleaner, which not only helps to loosen any trapped dirt, but also kills harmful bacteria and germs.

In contrast, a professional grout cleaner will also know the importance of using non-toxic products that don’t contain harsh chemicals. In addition, the use of protective gloves and masks is an essential safety measure. Keeping these safety precautions in mind helps to ensure that grout cleaning is both effective and safe.

Consequently, when it comes to professional grout cleaning, the science behind it is just as important as the practical experience. With the right combination of tools, products, and safety measures, grout can be transformed and look like new. When done correctly, the result can be a fresh, clean, and beautiful kitchen or bathroom.

Health Benefits of Keeping Your Grout Pristine

Maintaining a clean and pristine grout can have many health benefits. Research shows that it can eliminate unwanted bacteria and mold, which can cause a variety of health problems.Having clean, germ-free surfaces protects residents from long-term exposure to mold, which could trigger allergies, respiratory issues, or other health issues. In addition, grout and tile cleanliness can also help prevent the spread of other illnesses.

However, keeping grout and tile is not easy. Grout is especially vulnerable to exposure to water and moisture, which can lead to cracks and unsightly dark discoloration. Moreover, regular mopping and scrubbing may not completely remove dirt and bacteria stuck in the grout lines, leaving them vulnerable to recurrent contamination. To really clean the grout, it is necessary to use specific products that have been designed to penetrate the grout and eliminate dirt, discoloration, and bacteria, leaving it sparkling clean.

In addition, sealing the grout lines helps to make them resistant to water and moisture damage, as well as discoloration. Furthermore, sealed grout lines also become more resistant to contamination buildup, which can help to prevent the spread of germs and mold. Sealing every 12-18 months is recommended in order to ensure a durable, germ-resistant surface.

Consequently, there are many benefits to having clean and pristine grout. From protecting from germs to enhancing the overall appearance of the home, pristine grout means a healthier home.

Increasing Property Value with Clean Grout

Increasing the value of a property is something most owners strive for. One of the most cost-effective ways of doing so is by maintaining and improving existing features. Cleaning grout can be an easy and low-cost way to increase the value of any property. However, cleaning grout in the right way requires the right knowledge and materials.

Grout is an inexpensive, easy to install, and popular material used to fill up small gaps between tiles or other flooring materials. Even with regular cleaning, grout can become dirty due to its porous nature which traps oils, dirt, and bacteria. Furthermore, the grout can also become darkened and discolored if a powerful degreaser or acidic cleaner has been used inappropriately.

On the other hand, regular grout cleaning using the correct materials can help to maintain the grouts’ color and therefore increase the properties overall hygiene and appeal. In addition, many sealers are available and can be used on grouts of various materials including porcelain, ceramic, and marble. This will also help make the grout more resistant to staining and dirt, in turn making it easier to keep clean. Similarly, bleach-based grout cleaners can be used to remove dirt and discoloration, ensuring that grout is looking clean and fresh.

Consequently, homeowners who make sure their grout is clean, sealed, and discoloration-free can add value to their property. The cost required to achieve this can be fairly low, and in turn this can result in a higher selling price when the time comes to put the property on the market. For instance, buyers will not only appreciate seeing that the property is clean, but will also see that you have taken the necessary steps to ensure that future grout maintenance is likely to be relatively straightforward.

In conclusion, simply cleaning and sealing grout can be an immensely effective way of increasing the value of a property. By ensuring that the grout is clean and sealed, buyers will be able to appreciate a cleaner and more appealing property.

Key Takeaways

It is evident that DIY grout cleaning, while an admirable effort, and sometimes successful, just doesn’t seem to cut it in terms of an in-depth and long-lasting clean. With the science of professional grout cleaning, more sophisticated products and experienced professionals are available to better break down the right types of grime and restore grout to something more visually pleasing. The deeper clean not only has aesthetic benefits, but lasts longer due to the correct cleaning methods, which prevents future accumulations of dirt and bacteria and helps ensure a healthier home. The upped appeal of a renovated grout line not only helps to ensure a more high-end feeling in the house, but also significantly increases the property value, making it a win-win situation.

Frequently Asked Questions

Why can’t I get my grout white with store-bought cleaners?

Store-bought cleaners will not be able to get grout back to its original, bright white color because over time dirt and oils can penetrate the surface. The only way to get your grout back to its original color is to either paint it or use a professional grout cleaning service.

How often should I get professional grout cleaning?

Professional grout cleaning should be done at least once a year, but more often if you have heavy foot traffic or if the grout has become stained or discolored.

Can professional grout cleaning prevent mold growth?

Yes, professional grout cleaning can help prevent mold growth. Regularly cleaning grout, especially in damp areas such as bathrooms and showers, removes dirt, debris and moisture, creating an environment that is less conducive to mold and mildew growth. Additionally, specialized grout sealers can be applied to create a protective barrier on grout, further reducing the chance of mold growth.

Is professional cleaning safe for colored grout?

Yes, professional cleaning is safe for colored grout. Professional cleaners use mild detergents and high-pressure steam cleaning equipment that is safe for all kinds of grout, including colored grout. When cleaning colored grout, professional cleaners use specialized cleaning techniques to protect the dye from fading. They also use the correct tools and cleaning solutions to ensure that the grout remains intact and free of dirt and stains.

How a Clean Dryer Vent Can Save You Money and Energy

Dryer vents are an important part of our households, yet many people do not realize the science, financial, and environmental benefits behind a clean dryer vent. In this introduction, we will explore the science behind dryer vent efficiency, the various financial benefits, the impact of reduced energy consumption with a clean dryer vent, and best practices for regular dryer vent maintenance.

The Science Behind Dryer Vent Efficiency

The science behind dryer vent efficiency is quite complex and involves understanding the relationship between the dryer, vents, lint, and proper functioning. Dryers work by drying clothes and other items by circulating air that has been heated by an electric heating element. Hot air is pushed from the drum of the dryer out through the vent to the outside and the spaces between walls or floors. The function of the dryer vent is to move heated air and lint out to the outside by creating an optimum airflow.

However, the lint that collects in the dryer vent, if not removed, can decrease the airflow and reduce the efficiency of the dryer. Lint is created from the clothing and other materials dried in the dryer and can trap in the lint trap and the dryer vent. The build-up of lint in the vents can block the air from escaping and reduce the efficiency of the dryer.

On the other hand, dust mites and other allergens, as well as mold and mildew, can also build up in the dryer vent if it is not regularly cleaned and maintained. This accumulation of airborne particles can cause air quality concerns and worsen asthma and other respiratory ailments. In addition, if the dryer vent is obstructed, this can cause the vent’s connection to lose its seal and risk creating a fire hazard if the air and heat cannot escape.

Therefore, to ensure efficient functioning of the dryer vent, regular cleaning and maintenance are necessary. Along with making sure to clear the lint trap after every cycle, it is recommended to have the dryer exhaust duct inspected at least once a year to ensure that it is free of lint and other debris. Cleaning the vent annually can help reduce fire risk, improve air quality, and help make the dryer more efficient. Furthermore, proper dryer vent design and installation are also important in improving overall efficiency and safety.

For instance, the ideal dryer vent design should create a long and straight air path from the dryer to the outside with as few bends and turns as possible. This allows for increased airflow and reduced lint build-up. The vent should also be installed in the warmest area of the house, to allow for more efficient heating, and it should be kink-less. Additionally, it is beneficial to have a larger diameter dryer vent pipe, which will increase the airflow and decrease the possibility of clogs.

In contrast to the abovementioned measures, another aspect of proper dryer vent installation and maintenance is ensuring the right kind of materials are used. Dryer vent pipes and fittings made from plastic materials can hold onto lint more easily and decrease the efficiency of the dryer. Similarly, using too many different kind of vent pieces can create bends in the air path, causing a decrease in air flow.

As a result, using metal or rigid aluminum vents offer the best option for increasing the air flow and efficiency of the dryer. Metal fits more tightly and won’t hold onto lint due to the surface being smooth. Consequently, it is highly recommended to use metal when installing a dryer vent, as using a metal vent can help to reduce lint build-up in the dryer vent and improve dryer efficiency overall.

Understanding the Financial Benefits of a Clean Dryer Vent

Having a clean dryer vent is beneficial for many reasons beyond convenience. Understanding the financial benefits of a clean dryer vent can help motivate homeowners to prioritize routine cleanings and repairs.

In addition, a clean dryer vent helps reduce utility costs. When a dryer builds up lint, it requires more energy to dry clothes. This forces your dryer to run longer and increases the amount of energy used, thereby increasing the overall cost of the energy bill. Conversely, a clean vent allows the dryer to do its job efficiently, working at maximum power and using less energy.

However, lint buildup is not the only issue. When lint accumulates in the vent, it can become a fire hazard. To avoid this, proper maintenance and routine cleaning of the dryer vent is necessary to prevent dangerous situations from occurring. A properly maintained vent decreases the likelihood of a home fire and any associated costs, including ruined property and possible medical bills.

Furthermore, having a clean dryer vent helps to extend the life of the dryer. A dryer full of lint is more prone to wear and tear, which can lead to expensive repairs or premature replacement. Keeping the vent clean helps reduce damage to the dryer, saving money by avoiding costly repairs or an entirely new dryer altogether.

Consequently, understanding the financial benefits of cleaning and maintaining a dryer vent is important in order to keep homes economical and safe. Not only does a clean dryer vent have the potential to save money, but it also helps prevent unpleasant and potentially hazardous situations from occurring.

Environmental Impact: Reduced Energy Consumption With A Clean Dryer Vent

It is widely known that energy consumption is one of the most detrimental factors affecting our environment. One impactful step that can be taken to reduce energy consumption is to ensure that home dryer vents are clean. A dryer vent that is clogged by lint and dust buildup will cause the unit to be less efficient and can add to energy and fire hazards. Consequently, by properly maintaining a dryer vent, energy consumption will decrease and allow for a reduction in environmental damage.

On the other hand, if dryer vents are not routinely inspected and cleaned, the appliance will have to run for longer in order to dry clothes efficiently. In addition, the air will become unbearably hot, costing the homeowner in increased electricity bills as well as affecting air quality. Similarly, an accumulation of lint can require the appliance to run for extended periods of time, which reduces the dryer’s efficiency and pushes the energy consumption to much higher levels.

Moreover, it is important to maintain dryer vents for other reasons than just reducing energy consumption. If the appliance is not regularly cleaned, dangerous build-up of lint can cause a fire hazard due to dryer heat being unable to escape. Therefore, homeowners should inspect their dryer vents for any lint accumulations at least once a month, and have the vents professionally cleaned every one to two years.

Apart from defending against a fire hazard, installing a dryer vent booster fan can help to regulate air temperature, making it more efficient for the appliance to dry the clothes faster. Furthermore, dryer vent booster fans will automatically turn on and off to maintain the correct temperature needed to sustain energy efficiency. By maximizing air flow, dryer vents can play a major role in limiting energy consumption.

Finally, an energy-efficient, well-maintained dryer will reduce utility bills, save time, and contribute to sustainable living. As a result, setting up a clean dry vent is an incredibly effective and practical step to take for achieving efficiencies with dryer energy consumption.

Best Practices for Regular Dryer Vent Cleaning

Dryer vent maintenance is an important task that should be done on a regular basis due to the potential hazards of poor upkeep. A clogged dryer vent can cause lint buildup as well as increased energy costs and the risk of a house fire. Fortunately, there are some best practices to follow for regular dryer vent maintenance.

One of the most important things to do is to clear the lint filter after every use. This simple step helps to prevent lint buildup that can impact the performance of the dryer and even lead to a fire. Additionally, it is important to inspect the outside dryer vent every three to four months to ensure that it is in good condition. In case the vent is damaged or clogged, it should be promptly serviced by a professional.

On the other hand, if the dryer runs longer than normal it is a sign of poor dryer vent performance. Consequently, it is important to inspect the dryer vent system to make sure it is functioning correctly. Similarly, if the dryer is hot to the touch it is likely caused by a clogged vent and should be inspected as soon as possible. Furthermore, placing the dryer away from flammable materials, such as curtains, helps to reduce the risk of fire.

In conclusion, regular dryer vent maintenance is essential as it helps to prevent lint buildup, save energy costs, and protect against the risk of fire. Following the best practices mentioned above should help to keep the dryer vent in good condition.

The Honest Guys Clean Dryer Vents

Iit is clear that a clean dryer vent is crucial to ensure optimal efficiency levels to save energy, costs, and environmental resources. Clean vents help reduce the amount of time it takes to process clothes thus using less electricity. The lint trap should be cleaned before and after each use, and a professional inspection and cleaning service is recommended at least annually. It is also best practice to have a dryer that is certified to be energy efficient. Ensuring regular maintenance and proper dryer vent installation is the best way to achieve optimal efficiency and reap the financial and environmental benefits.

Call The Honest Guys For A Cleaner Dryer Vent Today!

Frequently Asked Questions

How often should I clean my dryer vent to ensure maximum efficiency?

In order to ensure maximum efficiency, you should clean your dryer vent once a year. However, if you notice that your dryer takes a long time to dry clothes or you find that there’s lint build-up around the vent opening, you should clean more frequently.

What are the warning signs that my dryer vent might be clogged or dirty?

1. Your clothes are taking longer to dry than usual
2. Your laundry room is unusually hot and humid
3. Unusual smells or smoke emitting from your dryer or laundry area
4. Your dryer’s exterior is unusually hot to touch
5. Your lint filter is filled with dust and lint after each cycle

How much money can I realistically save on my energy bill with a clean dryer vent?

The amount of money you can save on your energy bill by having a clean dryer vent depends on a variety of factors, such as the age of your dryer, the type of dryer you have, and how clogged your dryer vent is. That being said, you can usually expect to save around 5-10% on your energy bill if your vents are clean.

Is it safe to clean the dryer vent on my own or should I hire a professional?

It is generally safer to hire a professional for dryer vent cleaning as they have specialized tools and the proper knowledge and experience to get the job done safely and correctly. Attempting to clean the dryer vent yourself can put you at risk of damaging the dryer, vents, or other components, and you may not be successful in fully removing lint and debris.

Secrets to a Spotless VCT Floor: Pro Tips and Tricks

Welcome to our guide to understanding VCT: The Basics and Benefits, Routine Maintenance: Keeping Your VCT Floor Gleaming Every Day, Dealing with Stubborn Stains and Scuffs on VCT, and Expert Recommendations: Best Products and Equipment for VCT Care. Vinyl Composite Tile (VCT) is a widely used floor option that is popular in commercial spaces for its durability and relatively low-maintenance. In this guide, we’ll explore the fundamentals and benefits of VCT, provide tips for keeping it clean and well-maintained over time, and give expert recommendations on the best products and equipment for VCT care.

Understanding VCT: The Basics and Benefits

Understanding VCT: The Basics and Benefits

A Venture Capital Trust (VCT) is an investment model offered by the UK government, designed to help people earn attractive returns on their capital. It enables investors to take advantage of the growth potential of early-stage businesses and the tax benefits that come with it. An interesting aspect of VCTs is that they can be invested in shares of any size business, from start-ups to established companies.

Investing in a VCT involves buying or selling shares in a specific company or investment trust. The majority of VCTs are listed on public exchanges, allowing investors to buy and sell shares without having to open a brokerage account. Investors may also choose to purchase private VCTs through financial advisors or venture capital firms.

VCTs provide a variety of tax savings, allowing investors to defer their income tax or capital gains tax on an annual basis. Additionally, the government allows investors to maintain their VCT shareholding for five years to qualify for a 30 percent tax relief. This tax relief can be further increased to up to 50 percent by investing in the right type of VCTs.

Moreover, VCTs provide a range of other benefits, such as the ability to invest in a high-growth sector that may otherwise be too risky to invest in. By investing in a VCT, investors can access a wide range of innovative companies and new products, which may not be available through traditional investment products. Furthermore, VCTs are also able to provide diversification and security, as investments are spread over multiple companies and industries.

In addition, VCTs can also provide investors with a level of liquidity, as investors can access their capital fairly quickly if needed. This is because, unlike other venture capital firms, VCTs do not need to wait for companies in the portfolio to develop to the point where they can sell shares. VCTs can trade in and out of the funds at any time, providing investors with a level of control and flexibility.

As a result of these tax benefits and the potential for capital growth, VCTs have become increasingly attractive to investors. They provide a way for investors, both large and small, to access the growth potential of early-stage businesses and access attractive tax savings. Consequently, for those looking for an interesting way to enter the market, VCTs could be the right answer.

Routine Maintenance: Keeping Your VCT Floor Gleaming Every Day

Routine maintenance is an essential part of keeping a VCT floor gleaming every day. Vinyl composition tile (VCT) is one of the most durable and cost-effective flooring options for commercial, industrial, and institutional buildings. Its special composition allows it to retain its shine with minimal maintenance and inexpensive products. However, despite the fact that routine maintenance isn’t a requirement for the longevity of a VCT floor, proper care does help ensure a nice shine and an appealing ambiance in a room or workplace.

One of the most important tasks in maintaining a VCT floor is to mop it regularly, ensuring that all dirt, dust, and spillage are taken care of. In addition, it’s important to use a well-diluted cleaning solution that is specifically designed for VCT floors. Furthermore, to get the best shine, the area should be finished with a buffing machine. This will allow for the VCT floor to remain uniformly clean and gleaming.

Moreover, although wax and polish may be used on a VCT floor, these should generally be used sparingly; most VCT floors don’t need this kind of extensive maintenance. This allows for more of a shine to remain in the floor over a longer period of time, as opposed to other floors that may have a wax applied more frequently. Consequently, wax and polish can conserve time and money while still ensuring the desired appearance and protection of the floor.

When in the event of a spill, it must be tended to immediately. For instance, if liquid is spilled on the VCT floor, it must be wiped up quickly. Similarly, if there is grime or dirt that remains after mopping, it should be cleaned quickly with a damp cloth or a clean mop. This will ensure that the VCT floor will be kept looking beautiful and require minimal maintenance.

In summary, routine maintenance is an important part of ensuring that a VCT floor remains looking its best. From regular mopping and wax application to cleaning up spills quickly, all of these steps are essential for a gleaming VCT floor. With a few simple steps, VCT floors can remain looking great for many years and create the desired appealing appearance for any workplace.

Dealing with Stubborn Stains and Scuffs on VCT

Dealing with stubborn stains and scuffs on VCT can be a difficult task. Nonetheless, it is possible to restore this vinyl composition tile (VCT) to like-new condition with the right methods. The key is understanding the properties of VCT and how to treat it correctly.

Generally, VCT has a wax layer to help protect it from scratches and stains. However, over time and wear the wax layer can become damaged and the VCT will require maintenance. If you are dealing with a stubborn stain or scuff on VCT, the first step is to try and gently remove it with a soft cloth. Most often, a damp cloth will do the trick.

In addition, a mild detergent or a special floor cleaner designed for VCT can also be used. After thoroughly cleaning the affected area, make sure to buff it dry with a cloth. This will help to restore the wax coating and aid in defending against future stains and scuffs.

Furthermore, should a stain be more resilient than cloth and detergent, there are more industrial techniques for dealing with stubborn stains such as using mineral spirits or special industrial cleaners. It is important to note, however, that these are quite powerful chemicals and so should be used sparingly and with care.

Consequently, after any cleaning procedure make sure to properly reapply the wax coating to the VCT in order to protect the tile’s surface. For detailed instructions on waxing VCT please consult your Tile Manufacturer’s instructions for maintaining your particular product. Proper maintenance will help the VCT retain its luster and durability over time.

Expert Recommendations: Best Products and Equipment for VCT Care

Expert Recommendations: Best Products and Equipment for VCT Care

When preparing to provide the best possible care for a VCT patient, it is important to have the right products and equipment at your disposal. To ensure the health and safety of those involved in a VCT care program, experts suggest using the products and equipment below.

Firstly, proper protective gear can greatly reduce the risk of contamination. Masks, gloves and exam gowns should be used in each examination room. Proper ventilation systems and air filtration systems should be installed to reduce the airborne contamination. It is also recommended to have the appropriate cleaning and disinfecting solutions or media for various surfaces.

In addition, examination tools should be provided at VCT clinics, such as stethoscopes, ophthalmoscopes, dermatoscopes, blood pressure cuffs and thermometers. Moreover, blood collection kits must be stocked at all times in order to collect and analyze a patient’s blood sample. These can range from basic to more advanced tools such as hematology analyzers.

Furthermore, VCT clinics should invest in durable and sanitary furniture such as examination tables, chairs, desks and bedding. Additionally, setting up a waiting area with comfortable yet safe seating is an important part of providing quality healthcare to all VCT patients.

Finally, having a reliable supply of medications and medical supplies is essential. Commonly used medications used in VCT centers include antibiotics, anticoagulants, anti-inflammatory drugs, antivirals and painkillers. Medical supplies such as needles, syringes and IV solutions should also be available at all times.

Consequently, the use of proper products and equipment when providing VCT care will help to ensure the safety and comfort of both patients and medical professionals involved. Having the correct supplies on hand can go a long way in ensuring the best possible healthcare.

Final Thoughts

VCT flooring is a great choice for commercial and residential properties due to its durability and cost-effectiveness. To make sure it lasts, it is important to understand the basics of VCT and the benefits of proper maintenance. Routine maintenance should involve mopping regularly with a neutral cleaner, stripping and waxing as necessary, and never using over cleaning products or too much water. If stubborn stains or scuffs arise, they can be removed with a nonabrasive cleaner, taking a more aggressive approach if needed. When choosing the best products and equipment for cleaning and maintenance, it is important to use neutral cleaners, pH balanced detergents and detergents with enzymes, along with mops without too much water, microfiber dust mops, and propane buffers with low RPM. By following these recommendations, your VCT floors will look their best and will last for years to come.

Frequently Asked Questions

What is VCT

VCT stands for Venture Capital Trust. It is a type of tax-efficient investment vehicle, which invests in smaller, relatively early stage businesses. The structure of a VCT allows investors to benefit from certain tax incentives, such as income tax relief.

and how is it different from other flooring types?

Different flooring types have varying levels of durability and require different types of maintenance depending on the material. For example, hardwood and laminate flooring are more durable than carpet, but require more frequent cleaning and occasional waxing to stay looking good. Tile and linoleum are very durable, but require a higher level of maintenance such as sealing and grout cleaning. Vinyl flooring is typically the most affordable option and is relatively easy to maintain.

How often should I polish or wax my VCT floor?

Generally, you should polish or wax your VCT floor every six to twelve months, depending on the amount of traffic. Higher traffic areas may require more frequent waxing and polishing.

Can I use any commercial cleaner on my VCT floor?

No. Using any commercial cleaner on a VCT floor can damage the floor’s wax finish, cause discoloration and decrease the longevity of your VCT floor. The best practice is to use a mild soap and water solution to clean VCT floors.

How can I restore the shine to my VCT floor if it looks dull or worn out?

To restore shine to a VCT (Vinyl Composite Tile) floor, you will need to strip, clean, and wax the floor. Begin by stripping off any old wax, sealer, or finish that is left on the surface, then thoroughly clean the floors with a vinyl floor cleaner to remove any residual build-up or dirt. Once the floor is completely dry, apply a new wax coat and spread it evenly using a lambswool applicator. Lastly, use a floor buffing machine with a white pad to buff the floor and bring back its shine.

Signs Your Air Ducts Need To Be Cleaned In Your Roswell Home

Do you suspect that your air ducts may need cleaning? If so, there are a few signs that can help you determine if you need to call The Honest Guys, Roswell’s leading air duct cleaning company.

Here are some signs that you may need air duct cleaning done in your Roswell home.

Dusty Vents Is A Sign Of Needing Your Air Ducts Cleaned

Dust buildup in air ducts is a common problem, and it can have a number of negative consequences. For one, dust can contain allergens that can trigger asthma attacks and other respiratory problems. It can also harbor bacteria and mold, which can lead to illness. In addition, dust buildup can reduce the efficiency of your HVAC system, making your home less comfortable and costing you more money on your energy bills.

The Honest Guys are Roswell’s leading air duct cleaning company. We use state-of-the-art equipment to remove dust, dirt, and allergens from your air ducts, leaving your home cleaner and healthier. We also offer a satisfaction guarantee, so you can be sure you’re getting the best possible service. If you’re concerned about dusty vents in your Roswell, GA home, call The Honest Guys today. We’ll help you get your air ducts clean and your home healthy.

Must Smells From Your Vents Is A Sign That It’s Time For Air Duct Cleaning

Musty smells in your vents could be a sign of mold and mildew growth. Mold and mildew can grow in your air ducts for a few reasons, such as:

  • Leaks in your ductwork
  • High humidity levels
  • Poor ventilation

If mold and mildew are growing in your air ducts, they can release harmful spores into the air. These spores can cause a number of health problems, including:

  • Allergies
  • Asthma
  • Respiratory infections

Mold and mildew can also reduce the efficiency of your HVAC system, making your home less comfortable and costing you more money on your energy bills.

The Honest Guys are Roswell’s leading air duct cleaning company. We use state-of-the-art equipment to remove mold, mildew, and allergens from your air ducts, leaving your home cleaner and healthier. We also offer a satisfaction guarantee, so you can be sure you’re getting the best possible service.

Call us today to schedule a free consultation. We’ll help you determine if your air ducts need cleaning and answer any questions you have.

Here are some additional tips to help prevent mold and mildew growth in your air ducts:

  • Keep your humidity levels low.
  • Inspect your ductwork for leaks.
  • Properly ventilate your home.
  • Clean your air filters regularly.

By following these tips, you can help keep your air ducts clean and healthy.

Poor Air Flow Is Another Sign

Do you notice that the air coming from your vents is weak or uneven? If so, you’re not alone. Poor airflow is a common problem in many homes, and it can be caused by a number of things, including:

  • Dirty air filters
  • Clogged or damaged ductwork
  • Blocked vents
  • Leaks in your ductwork

Here are some of the consequences of poor airflow:

  • Your HVAC system will have to work harder, which can lead to higher energy bills.
  • The air in your home will be less comfortable, and you may feel stuffy or even sick.
  • Dust, dirt, and allergens can build up in your air ducts, which can trigger allergies and asthma.

Don’t let poor airflow ruin your comfort and health. Contact The Honest Guys today to get a free quote and get your air ducts cleaned.

Checking The Filters For Your Air Ducts

Do you check your air filters regularly? If not, you’re not alone. Many people don’t realize how important it is to check their air filters on a regular basis. But dirty air filters can have a number of negative consequences, including:

  • Reduced airflow
  • Increased energy bills
  • Increased risk of allergies and asthma
  • Spread of mold and mildew

If you’re not sure how often to check your air filters, The Honest Guys recommend checking them every month. If you have pets or live in a dusty environment, you may need to check them more often.

Here’s how to check your air filters:

  1. Look for the manufacturer’s recommendation on the filter itself.
  2. If there’s no recommendation, look for the color of the filter. A dirty filter will be darker than a clean filter.
  3. If you can’t see through the filter, it’s time to change it.

If you find that your air filters are dirty, you may need to have your air ducts cleaned. The Honest Guys are Roswell’s leading air duct cleaning company. We use state-of-the-art equipment to remove dirt, dust, and allergens from your air ducts, leaving your home cleaner and healthier. We also offer a satisfaction guarantee, so you can be sure you’re getting the best possible service.

Don’t wait until it’s too late. Check your air filters regularly and call The Honest Guys if you need air duct cleaning service.

Getting Pet Hair Out of the Carpet: Everything You Need to Know

One of the main struggles of being a pet owner is having to reach for a lint roller every time your pet lays anywhere! Pet hair is very stubborn and will challenge you to do unimaginable stuff to get it out of every nook and cranny, including your carpets.

However, there are some methods and tricks on how to remove pet hair from carpet. You can use all kinds of tools and gadgets: lint rollers, rubber gloves, softeners, carpet rakes, hair brushes, soda, etc.

In this article, you’ll learn everything there is to know about the fastest and best way to remove pet hair from carpet.

Stay tuned!

How to Remove Pet Hair from Carpet

If you’re wondering how to remove pet hair from carpet, a million solutions may pop up in your head. Some will advise you to use baked soda or vacuum cleaners, while others will suggest that you take the whole carpet to a professional cleaning service.

Aside from the different cleaning techniques, there’s the problem of various pets and hair types. For instance, there’s a big difference between cats’ and dogs’ hair. Cats’ hair is thinner than dogs’ hair, while dogs’ hair has an outer and undercoat. Each of these hair types can get into your carpet and nest there.

Another crucial factor for removing your pet’s hair from the carpet is the type of carpet. There are all kinds of carpets: from polyester and nylon fiber to loop carpets. Of course, each one interacts differently with different pet hair types.

However, the most popular tools for removing pet hair from a carpet are:

  • A vacuum cleaner
  • A hairbrush
  • A carpet rake
  • Fabric softener
  • Lint rollers
  • Sponge mop.

Depending on the molting intensity and the hair type, you can choose which tool or technique suits you the best or combine them into a single one. Nonetheless, the two most typical pets are cats and dogs. So, logically, if you master the removal of their hair from your carpet, you’ve mastered the removal of almost any type of pet hair.

How to Get Cat Hair Out of Carpet?

Many simple yet effective ways will answer your question about how to get cat hair out of carpet. You can use a sponge mop, baked soda, a carpet rake, a window squeegee, rubber gloves, balloons, pet hair vacuum cleaners, etc.

Below, we’ll check out some of the most popular options:

The Kitchen Sponge

Sounds too simple? Well, it works; you can totally start by using your kitchen sponge. If you want to get rid of your kitten’s hair by using a kitchen sponge or a sponge mop, you’ll have to begin by thoroughly vacuuming the whole carpet.

You’ll just have to dampen the mop and cover the area where your cat’s fur is gathered. Then, you’ll want to make use of the coarse part of your dish sponge to pick up all the hair and rinse it away or replace the sponge.

A Fabric Softener

Another trick is to use a fabric softener. You can apply a fabric softener to prepare the area for a thorough cleanup. The advantage of using a fabric softener is that, when combined with warm water, it can loosen the stuck cat hair and make it easier to vacuum.

A Carpet Rake

The carpet rake is another tool to get rid of your kitten’s hair. You can use the carpet rake to comb the rugged surface of your carpets and rugs and remove the stuck cat hair. The process is pretty straightforward – the metal and the plastic pins of the carpet rake plunge deep into the carpet’s fibers and pull out the trapped hair. All you have to do is comb through it!

Baking Soda

In combination with a vacuum cleaner, baking soda can do miracles on your carpet. Baking soda will also deodorize your carpets and make them smell fresh and new! The process is simple and consists of two steps:

Scatter a light coating of soda over the hair-infested surfaces of the carpet
Leave the baked soda for a couple of minutes and vacuum the carpet

Note: Baked soda won’t damage your carpet’s fibers, but if applied in big amounts, it can damage the underlay or the floor. That’s why you should always apply a light coating and be careful where you sprinkle the soda.

How to Remove Dog Hair from Carpet?

Generally, you can use the same tools and techniques to remove your dog’s hair from the carpets. An advantage is that a dog’s hair is thicker than a cat’s, and you can more easily spot it and remove it from the carpet’s surface.

So, how to remove dog hair from carpet without vacuum? You can use carpet rakes, lint rollers, dog brushes, squeegees, fabric softeners, rubber gloves, etc. All these are efficient and easy ways to get the job done.

Dog Brushes

Dog brushes are an exquisite tool for getting rid of hair and fur stuck in the carpet. You can buy them in your local shop or order them online. In both cases, dog brushes can come in different forms and dimensions, and you’ll be free to choose the one that suits you the best.

Here’s a step-by-step guide for you on how to remove dog hair from carpet with a dog brush:

  1. Find a dog brush that has metal pins or bristles for the best results
  2. Find a focal point towards which you’ll brush all the stuck hair and fur
  3. Frequently remove the hair stuck in the brush
  4. Vacuum the piled hairs.

The Balloon Method

Using a balloon is an exciting and efficient method for removing your dog’s hair from the carpet. All you need is a couple of balloons. It may sound silly, but you’ll have to blow up the balloons and start rubbing them against the carpet’s surface. The static of the balloons will separate, attract, and pull the dog’s hair out of your carpet.

Rubber Gloves

If you’re determined and have enough time, you can always use your rubber gloves to pull out all the hair and fur. Using rubber gloves is the most effective yet exhausting method for cleaning your carpet. It’s also called the flip-flop technique. You can choose thin latex or rubber gloves for this purpose.

Following is the step-by-step rubber gloves/flip-flop technique:

  1. Put on a pair of rubber or latex gloves
  2. Run them under warm and clean water
  3. Use short strokes to rub over your rug or carpet
  4. Remove your dog’s hair from the gloves and continue rubbing.

Similarly to the balloon method, rubbing your rubber gloves over the carpet’s surface creates static electricity attracting the hairs.

Lint Rollers

If you’re petting a cat or a dog, a lint roller is a must-have tool! You can find them in all shapes and sizes. What’s more, lint rollers can also have long handles that will spare your back.

To properly use your lint roller, you’ll have to roll it over your carpet, and its sticky surface will pick up all your dog’s hair. However, the lint rollers aren’t practical for wider rugs or carpets because of the small roller area. You can also use your lint rollers to pick up your pet’s hair out of your clothing or other items.

A Rubber Squeegee & a Rubber Broom

The rubber squeegee or a rubber broom is another tool you can use to dispose of all your dog’s hair from the carpet. Rubber squeegees are easy to find and come in different shapes and colors. This tool can pull out hairs stuck deeply into the carpet and gather them in clumps. You can also use rubber brooms with a squeegee edge or rubble bristles.

The Best Way to Remove Pet Hair from Carpet

As we’ve seen, there are numerous ways and methods to remove your pet’s hair from the carpet. Moreover, they’re pretty similar for both cats and dogs. You can use balloons, rubber squeegees, brooms, lint rollers, fabric softeners, or baking soda to get those mulish hairs out of the rug.

Nonetheless, if you left your rug or carpet untended for a long time and there’s too much hair stuck between the fibers, cleaning it will be a hell of a job! That’s why many pet owners hire professional carpet cleaning services that are time, cost, and energy efficient.

If you can’t deal with the stubborn clumps of hair and fur on your carpet, don’t hesitate to give our team, The Honest Guys, a call! Our all-inclusive carpet cleaning services will ensure your carpets are good as new once we’ve done our magic on them.

FAQs

How to remove stubborn pet hair from carpets?

You can remove stubborn pet hair from your carpets in many different ways. You can use a vacuum cleaner, rubber gloves, balloons, brooms, lint rollers, or fabric softeners. You can even combine some of these tools and items into a single cleaning process.

What is the best tool for removing dog hair from the carpet?

There’s no best tool for removing your dog’s hair from the rug or the carpet. However, the most efficient way is to use a dog brush or rubber gloves. With a dog brush and rubber gloves, you can thoroughly clean your carpet and divide the hairs from the fibers.

Wood Floor Restoration.Jpg

How Do I Know If I Need My Wood Floors Restored?

If you have wooden floors in your home, it may be a blessing and a curse. Wooden floors are beautiful to look at but require a considerable amount of upkeep. If you’re wondering whether or not your wooden floors need to be restored, here are some tips…

You may need your wooden floors restored if…

  • There appears to be many scratches on the surface of your wooden floors
  • You notice that some boards are turning a grey-ish color
  • Your floors have experienced a considerable amount of water damage and may even be swelling up
  • Nails are poking through; This is a potential safety hazard and should be taken care of right away
  • Your floorboards move or creak when you walk on them
  • You are no longer satisfied with the overall look of your wooden floors and want a new look

To prepare your floors to be refinished, the process should include:

  • Extracting the moulding around the edges of the flooring
  • Sand the floor
  • Remove all dust and dirt

After these three steps have been taken, it is probably time for the professionals to come in and apply the wood stain and finish. If you’d like to try it on your own, be sure to rent the sanding machines, fill in any holes with putty after sanding, spot test the stain/finish you plan to use, and avoid dragging furniture back into the room where you restored the floors to prevent further scratching.

After you’ve put in work to either refinish your wooden floors yourself or if you hired professionals to get the job done, we recommend taking extra care of your floors following the restoration for as long as possible to ensure the restoration lasts for years to come.

After the restoration:

  • Try to limit the amount of foot traffic going through the room(s) where the restoration took place and clip the nails of your pets to prevent more scratching
  • Limit the amount of water that comes into contact with your floors
  • Sweep the floor frequently
  • Placing area rugs on top of the portion of the wood that was restored can be an easy way to ensure it won’t be scratched anytime soon

Once you’ve realized your wooden floors need restoration due to their scratches, discoloration, water damage, floorboard issues, or just their worn-out look, be sure to remove the moulding, sand, and remove dirt before you start the finishing process. Once the work is done, be extra careful with your newly restored floors to maintain their new look for years to come.